

The Elementor WordPress page builder makes it simple to create visually appealing pages and websites. Known for its active development team and constantly evolving set of widgets and features, Elementor makes it easy to create beautiful pages, posts, and entire websites.
However, even with such a powerful tool at your disposal, designing a new website can still be a time-consuming task. In this post, we’ll show you how to use Elementor’s powerful import/export to efficiently reuse your own templates across your web development projects.
From section templates to page templates and beyond, we’ll guide you through the process of Elementor import and export templates. Let’s get started!
How to Get Your Site Ready for a New Elementor Template (in 2 Steps)
Elementor templates provide a pre-designed layout for individual pages or specific User Interface (UI) elements, setting them apart from WordPress themes which alter the design of an entire website.
Unlike WordPress themes, it is possible to use multiple Elementor templates at the same time, as they only affect the layout of a single webpage.
However, it is important to keep in mind that these templates operate within the constraints of a WordPress theme, whether that be a free or premium version.
Before applying a new Elementor template to your website, it is advisable to consider how it may change the appearance or functionality of your site.
Step 1: Make a Backup
To ensure that you have a safety net in case of any issues with your new design, it is a good idea to create a backup before changing your Elementor template.
There are various plugins available that allow you to create a website backup, such as the UpdraftPlus plugin which can securely copy all of your files and database information to the cloud.
Taking this precautionary step will give you peace of mind and the ability to restore your content if needed.
Step 2: Place Your Website in Maintenance Mode
Before applying a new Elementor template to your site, it is recommended to put your website into maintenance mode to avoid any potential issues or disruptions for your visitors.
Changing your template may cause unexpected crashes, bugs, or other strange behavior, which can impact the user experience and potentially result in lost conversions.
To prevent visitors from accessing your site while you test and make adjustments to your new design, you can use a plugin such as WP Maintenance Mode, which allows you to create a custom maintenance page.
It is important to thoroughly test your site after applying a new template to ensure that it is functioning properly and providing a seamless experience for your users.
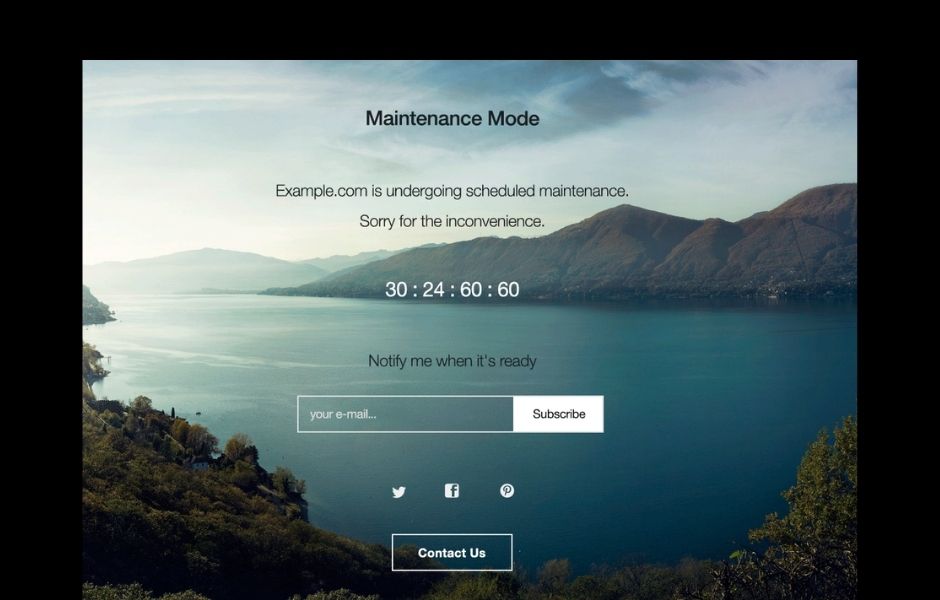
This plugin has lots of added extras, including adding a countdown to your maintenance splash screen. This feature can help you generate a buzz around your site’s redesign and relaunch.
Once your site is in maintenance mode, you’re free to experiment with various templates and test how they appear on your website’s frontend. When you’re happy with the results, you can take your site out of maintenance mode – and wow visitors with your site redesign.
How To Save Elementor Templates (2 Methods)
As one of the world’s most popular page builders, Elementor has no shortage of ready-made third-party templates. However, sometimes you may want to create your templates.
Using templates can help you achieve design consistency across your entire website. It can also save you time, mainly if you’re using the same designs across multiple sites.
For instance, WordPress design and development agencies may benefit from creating templates featuring the core elements they regularly apply to their client sites.
Method 1: Save a Page as an Elementor Template
You can save any page as an Elementor template. This can help you establish a standard look and feel, ready to deploy across your website.
For example, you might create your site’s menus, plus the header and WordPress footer. You can then apply this page template to all of your webpages.
Creating a template also means you won’t have to manually recreate the same elements for every web page. This is excellent news for your productivity.
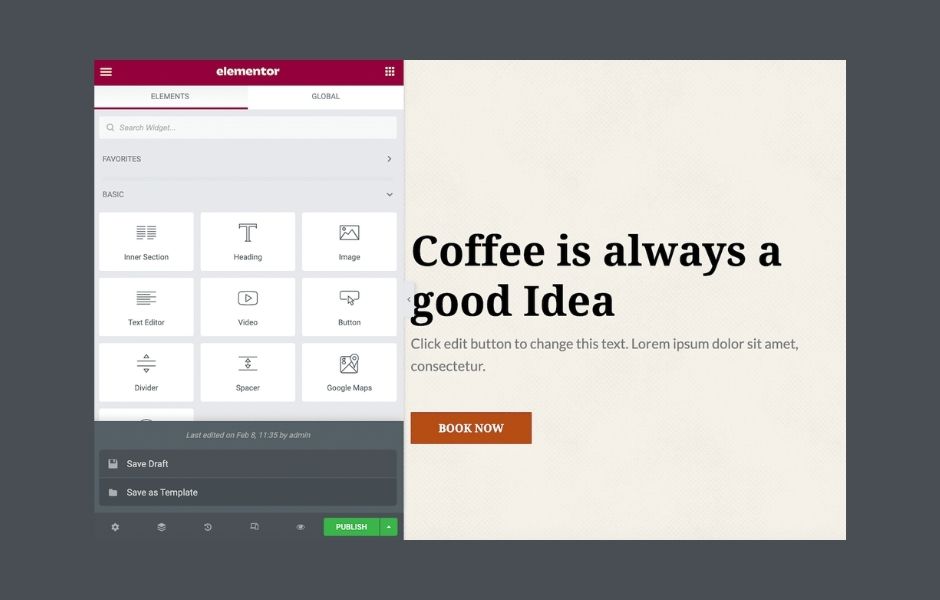
To save the current page as an Elementor template, find the green Update/Publish button at the bottom of the Elementor sidebar. Then, click on this button’s accompanying arrow icon:
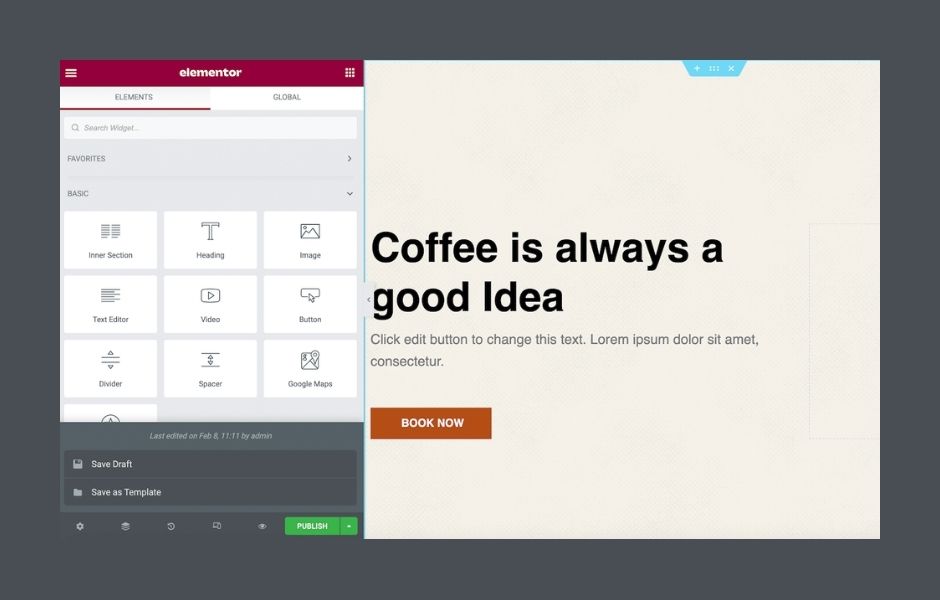
You can now click on Save as Template. This launches a window where you can give this template a descriptive name:
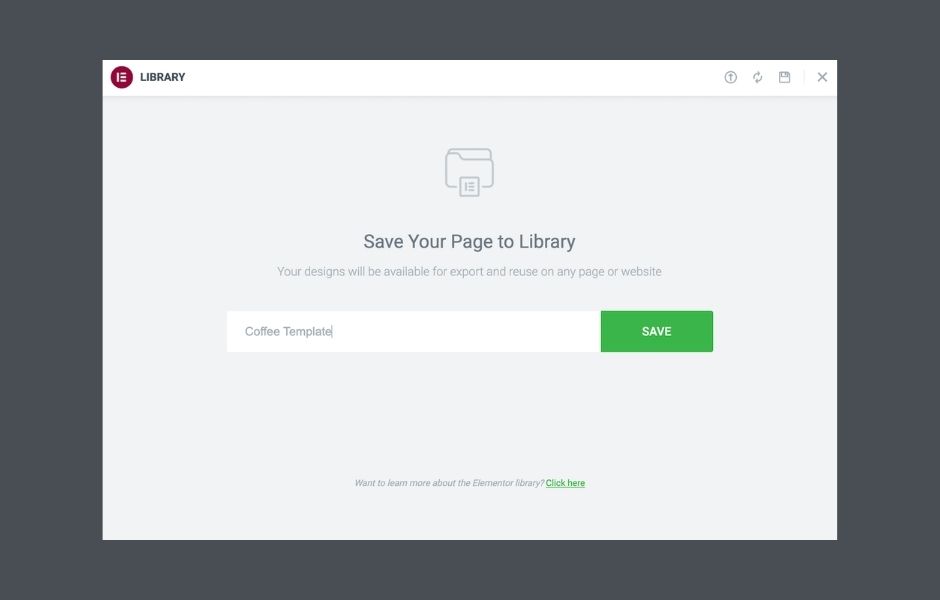
Then, click on Save. You can now access this design at any time by launching the Elementor library and selecting the My Templates tab.
Method 2: Save a Section as an Elementor Template
Many websites feature recurring elements. These include lead generation forms or text describing your top-selling products.
By making a section template, you can add it to any page with just a few clicks. You can even create section templates for different content categories.
For example, you might build a Call To Action (CTA) template. Then, every time you need a CTA, you can simply import this template and tweak its messaging.
To create a template, control-click on the Section in question. Then, select Save As Template:
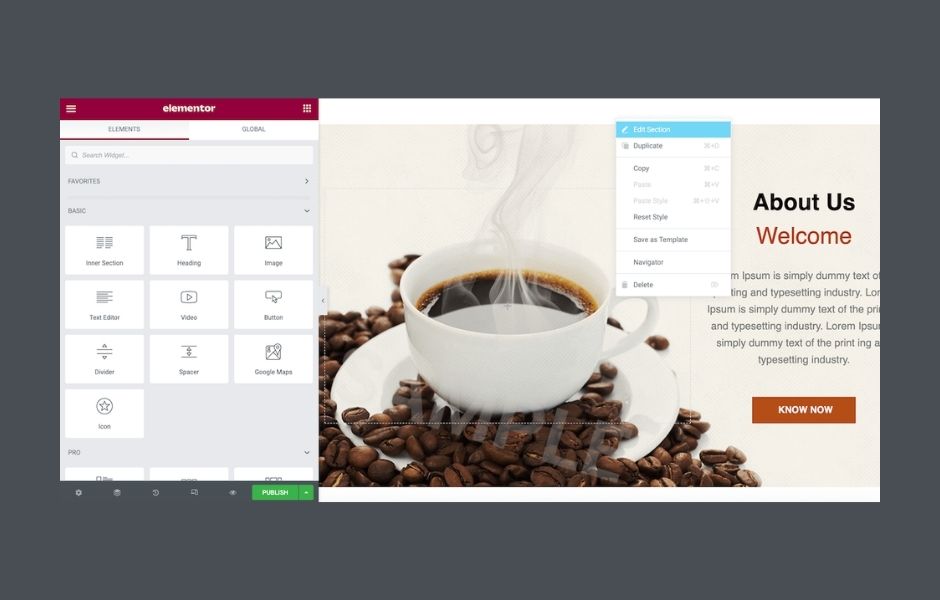
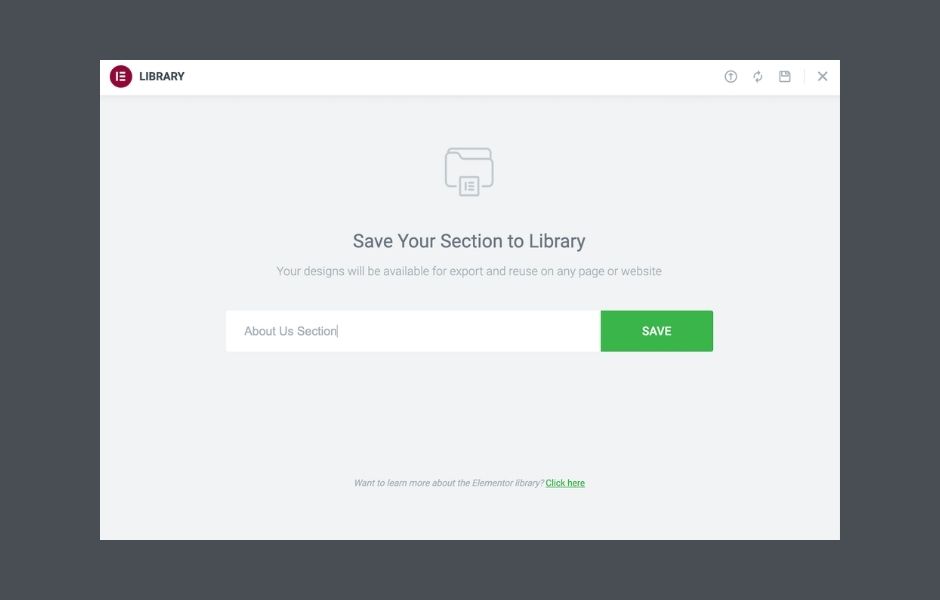
In the window that appears, give this template a descriptive name. Then, click on Save:
To use a template that you have created in any section, simply access the Elementor Template library and locate the design in the My Templates tab. From there, you can easily apply the template to any section of your website.
Designing Your Own Elementor Templates
If you want to create an Elementor template specifically for reuse, you can either save an in-progress page or section as a template or inform Elementor in advance that you are creating a template.
This latter approach gives you more flexibility to design templates for different areas of your website, such as error pages, search results pages, or popups.
You can also use any existing template in your library as the foundation for a new design.
To create a page or section template, go to Templates > Saved Templates in the WordPress dashboard and click on Add New.
In the next window, open the Select the type of template… dropdown to choose the type of template you want to create.

When creating a new template in Elementor, you can specify the type of template you want to create, such as a page or section template, and give it a descriptive name.
After clicking on Create Template, you can choose to use a pre-existing template as a base or start with a clean slate in the Elementor library.
You can then use the standard Elementor editor to design your template and click on Publish when you are ready to save it. This will bring up the Publish Settings box, where you can further customize your template and make it available for use on your website.
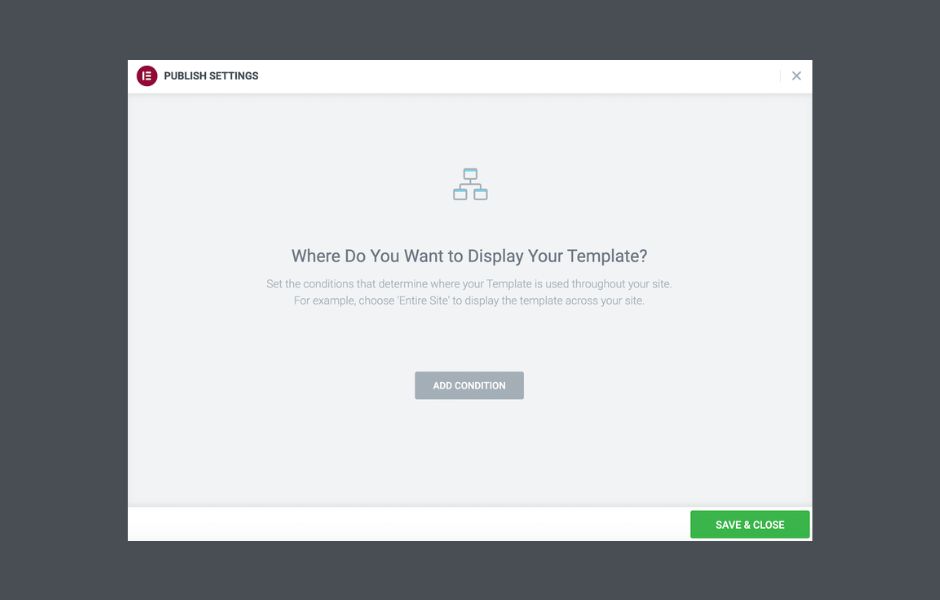
In the Publish Settings box, you can specify conditions for using your template, such as limiting its use to single pages or certain post types.
To do this, click on Add Condition and select the appropriate options from the dropdown menu.
This can be a useful way to ensure that your template is used appropriately and only displayed on the appropriate pages of your website.
How To Export Elementor Templates
Exporting Elementor templates from the WordPress dashboard can be a useful tool for sharing designs with colleagues or clients, creating backups of your designs, or even monetizing your work by making it available to others.
This feature is especially handy for WordPress design and development agencies that manage multiple websites, as it allows you to easily use your designs across multiple domains.
To export a design, simply navigate to the Templates > Saved Templates tab in the WordPress dashboard, which displays all of the templates saved in your library. From here, you can select a template and export it with just a few clicks.
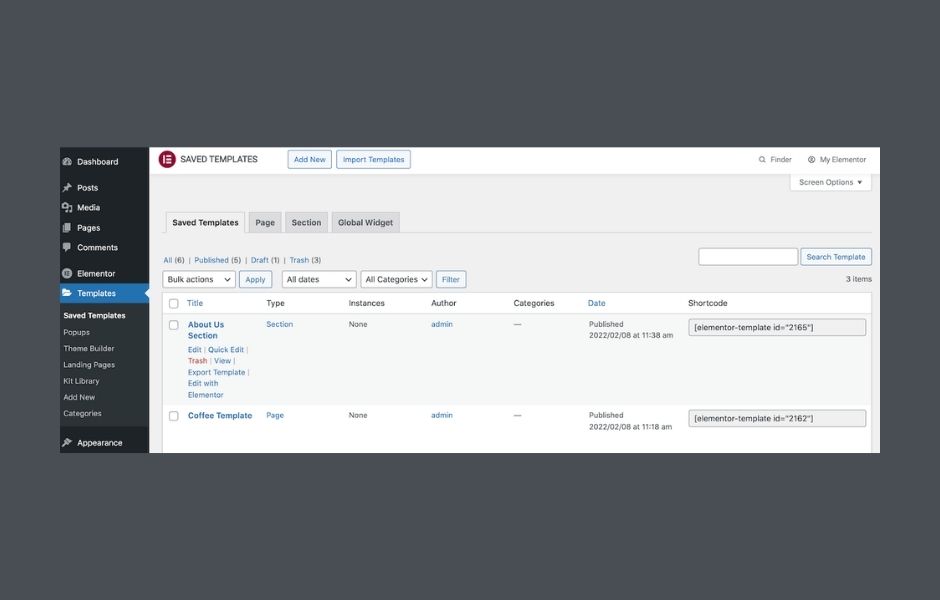
WordPress also divides these templates into Page and Section tabs. Simply find the template that you want to export, and hover over it:
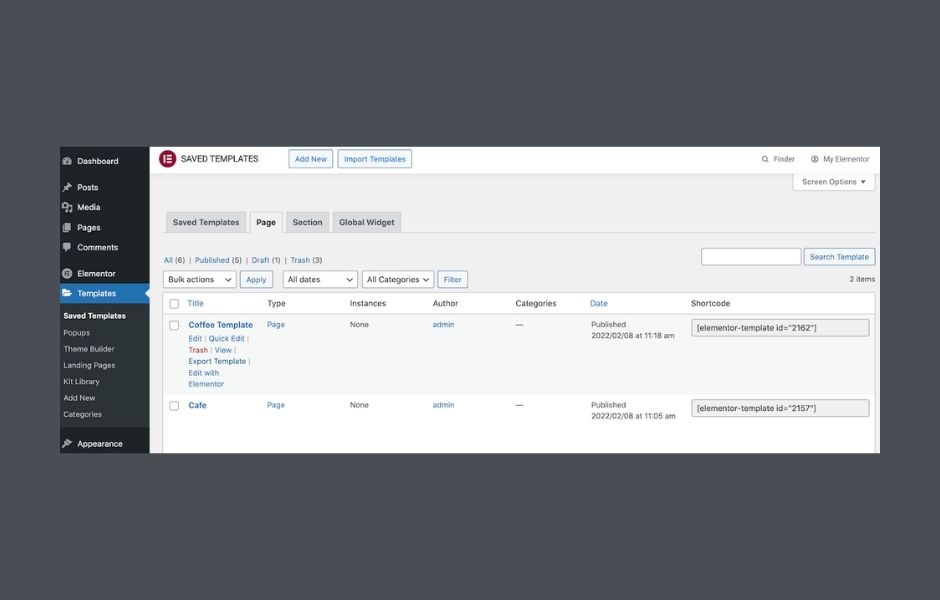
When the Export Template link appears, give it a click. Elementor will now download this template as a JSON file.
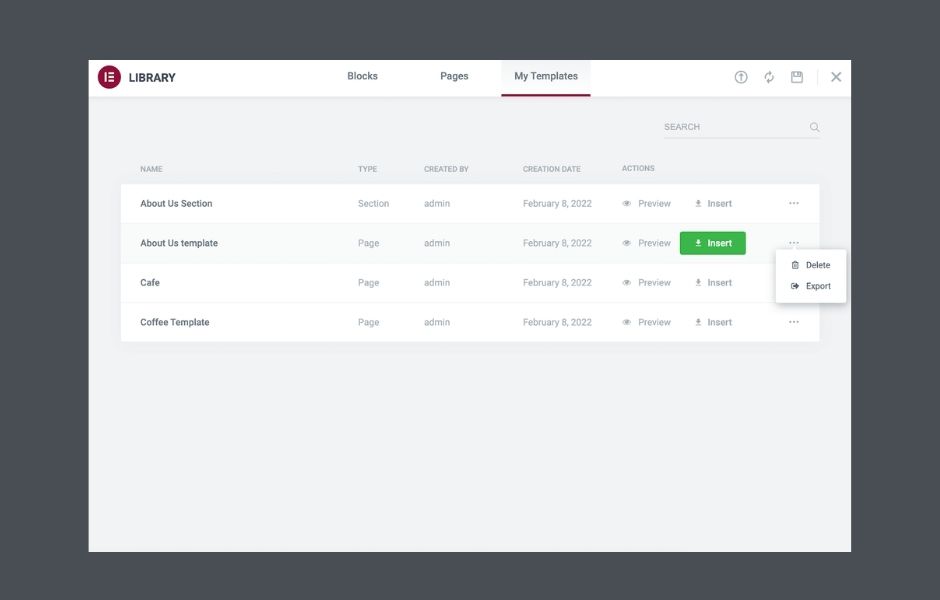
You can also export your templates from the Elementor library. Inside this library, open the My Template tab. Find the template that you want to export, and click on its accompanying three-dotted icon:
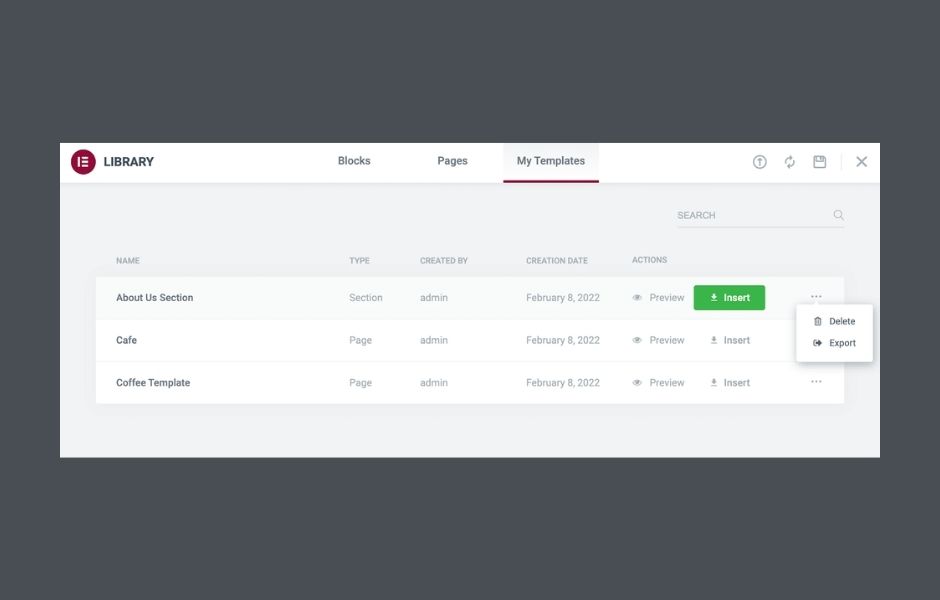
Then, click on Export. Elementor will now download this template as a JSON file.
How To Import Elementor Templates
Sometimes, you may want to import a template into Elementor. It might be a design exported from a different website or purchased from a third party.
If you have a template in JSON or ZIP format, you can upload it to the Elementor library. To start, navigate to Templates > Saved Templates. At the top of this screen, click on Import Templates:
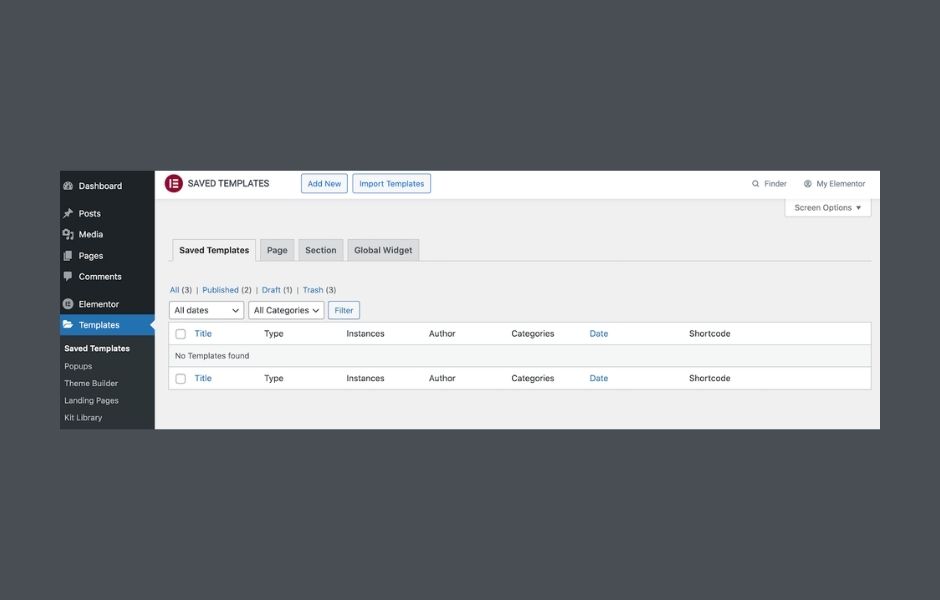
Then, select your Elementor import template and click on Import Now. This template will now appear in your library.
To apply this design to your website layout, simply open the page or post in question with the Elementor editor. Then, click on the Add Template icon, which is represented by a white folder:
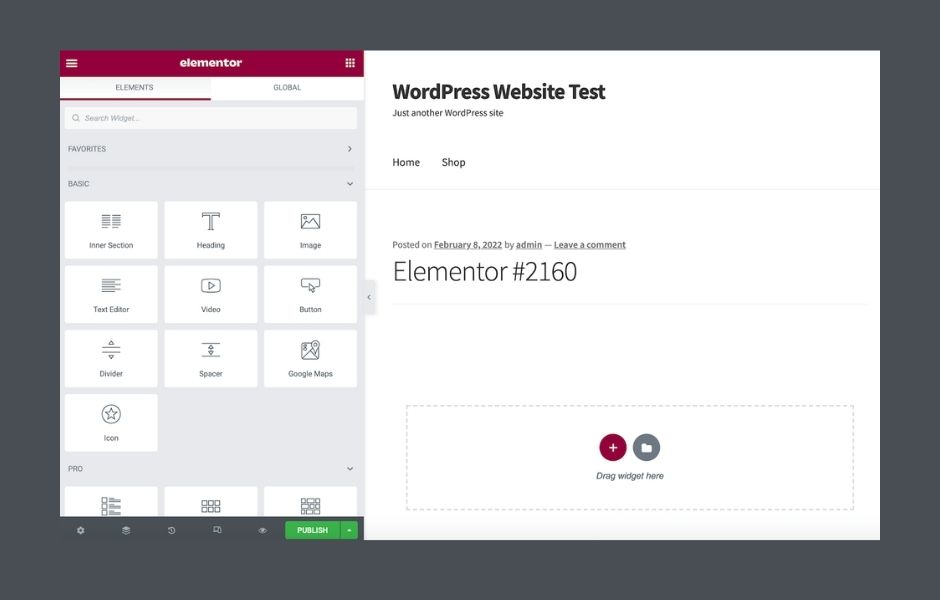
In the next window, select the My Templates tab. Here, you’ll find all your Elementor imported templates:
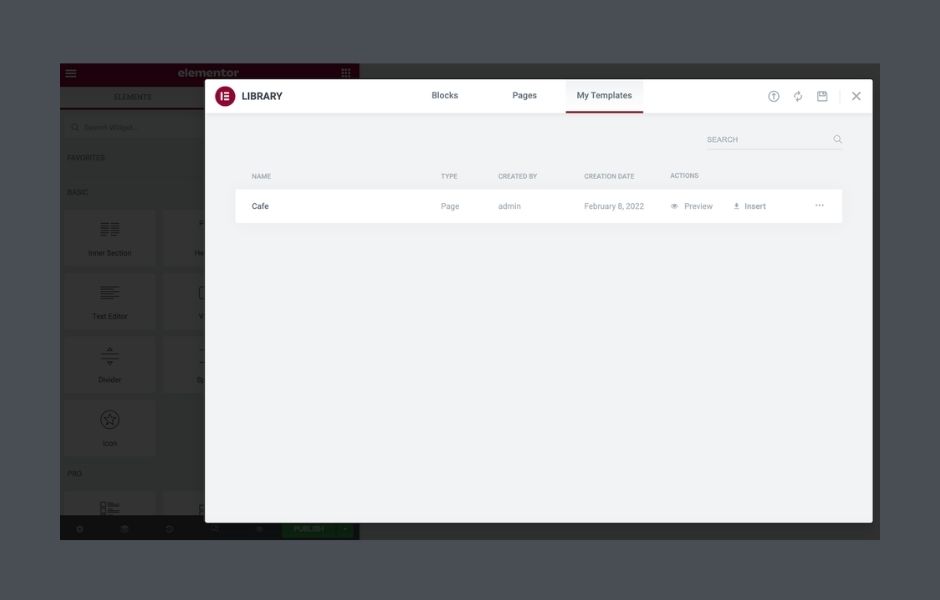
To see how this design will look when applied to the current page, click on Preview. If you’re happy to use this template, select its accompanying Insert link.
How To Export and Import an Individual Elementor Page
You may want to reuse the same page across multiple sites. For example, if you operate several WordPress websites, you might utilize a standard About Us page.
Rather than recreating this page manually, you can save it as an Elementor template and export it. You can then import the design into any website that has Elementor installed.
To save an individual page as a template, click on the arrow icon next to Elementor’s Publish/Update button. You can then select Save as Template:
In the subsequent popup, give this template name. Then, click on Save.
The WordPress template library should open automatically. You can locate the template you just created and click on its three-dotted icon. When prompted, select Export:
Alternatively, you can export this single-page template by navigating to Templates > Saved Templates in your WordPress dashboard. Then, hover over the template in question and click on Export.
Once the single-page template is safely stored on your local computer, you can import it to another website. Simply switch to your new site, and navigate to Templates > Saved Templates.
At the top of this screen, click on Import Templates. You can now import your single-page design.
How To Export and Import Your Entire Elementor Website (in 3 Steps)
While Elementor makes it easy to import and export single-page templates, you also may need to export an entire website.
For example, you might want to create a template kit containing all of your standard website pages, such as a contact page and homepage. You can then use this kit to form your basic websites.
Let’s see how you can create this kit. Here’s how to export your entire Elementor website in three easy steps!
Step 1: Enable Elementor Export Kit
Elementor’s Export Kit function can export your complete site, including its content and settings.
This function can be helpful if you’re creating related websites and want to maintain the same branding. For example, you might make a microsite to promote an upcoming product launch.
At the time of writing, Elementor’s Export Kit is an experimental feature. You’ll need to enable it by navigating to Elementor > Settings. You can then click on the Experiments tab:

Scroll to the Import Export Template Kit section. You can then open the accompanying dropdown and select Active:
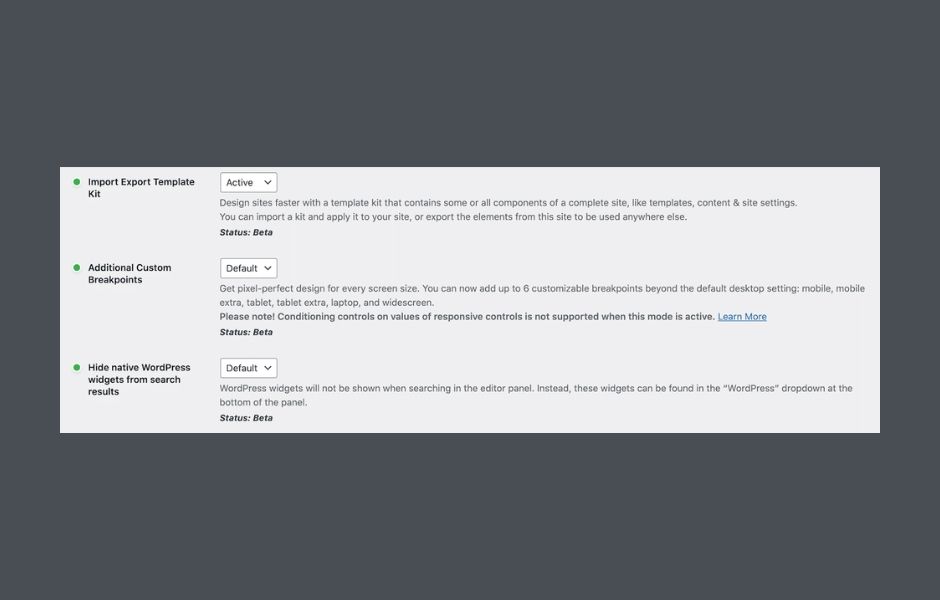
Don’t forget to scroll to the bottom of this page and click on Save Changes. This experimental feature is now ready to use.
Step 2: Export Your Entire Elementor Website
In your WordPress dashboard, navigate to Elementor > Tools. Now click on the Import/Export Kit:
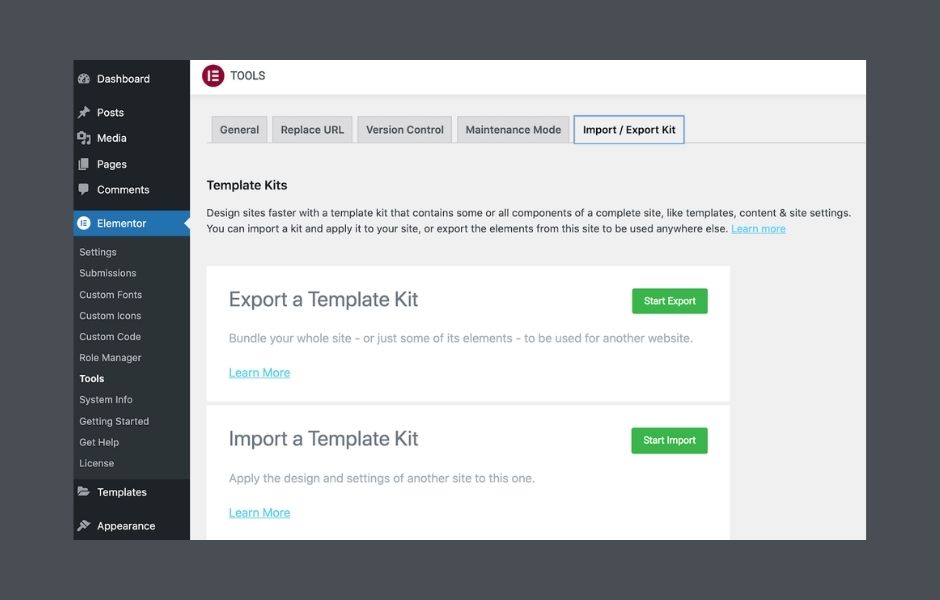
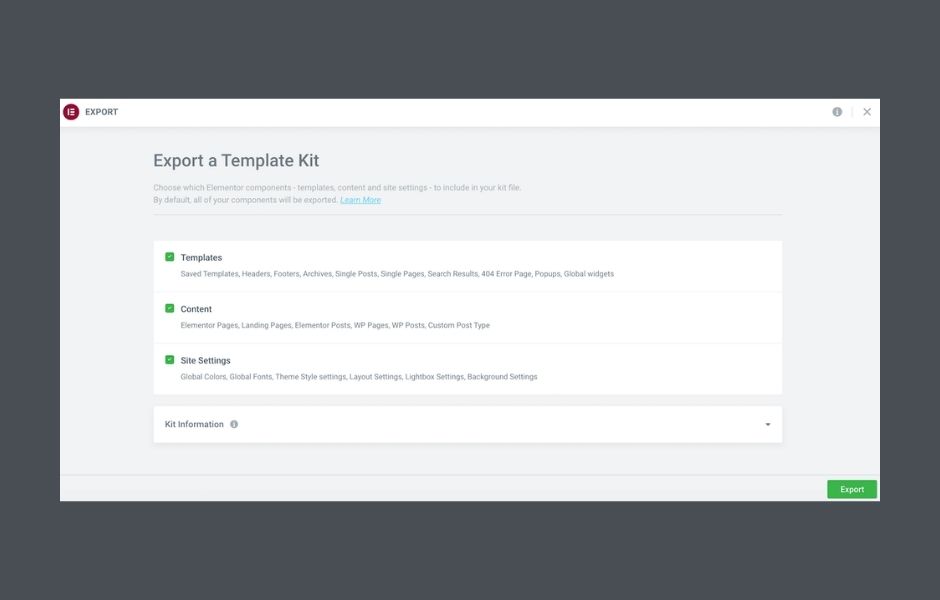
Click on Start Export. When prompted, specify the content and data you want to include in your download.
For example, you might choose to export your templates only. Alternatively, you can export all of your content, including pages, posts, and custom post types:
Next, click to expand the Kit Information section and give your file a descriptive name. You can also enter an optional description:
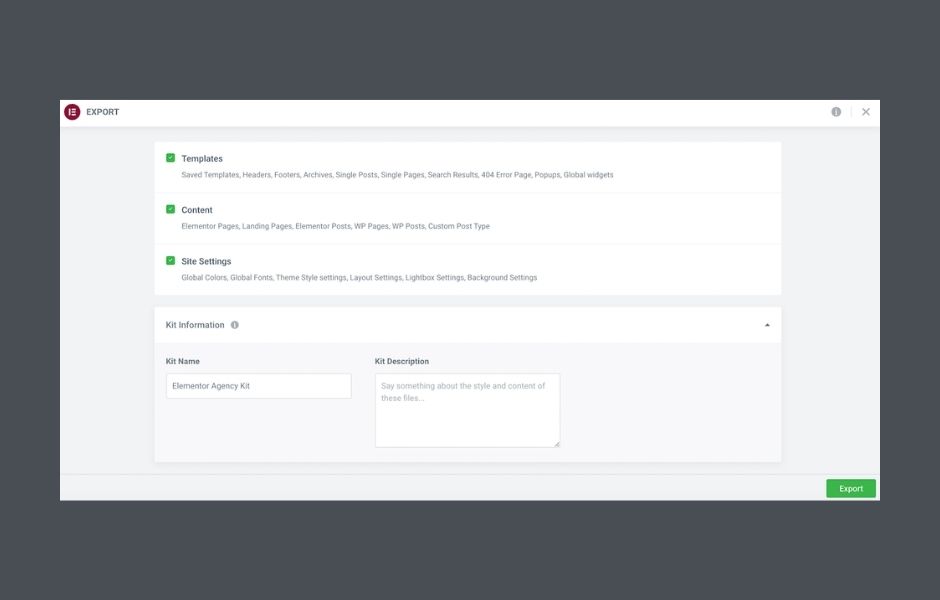
When you’re happy with your selection, click on Export. Elementor will now create your kit and display a summary of everything included in this file:
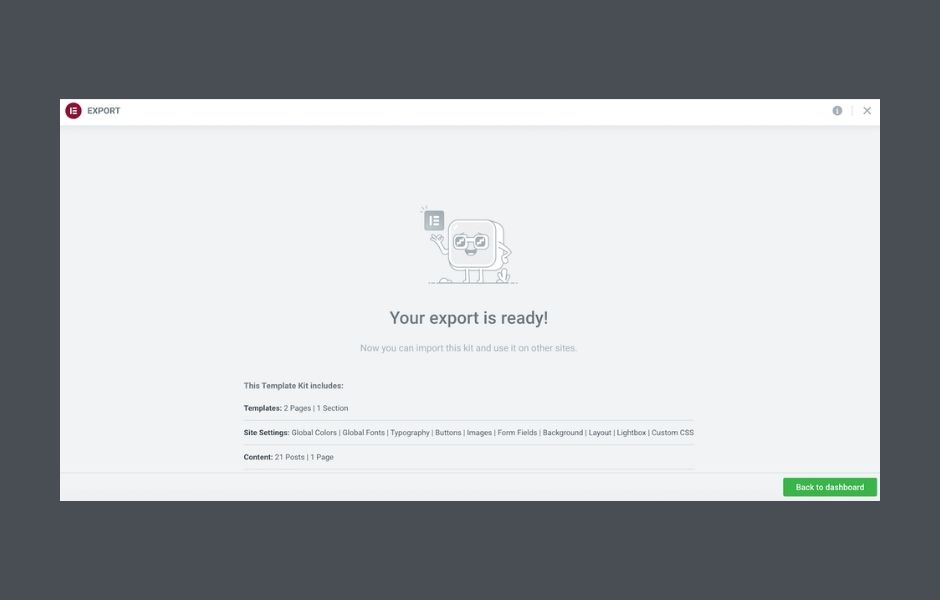
Elementor will download the generated kit to your computer automatically. When prompted, click on Back to dashboard.
Step 3: Import Your Site
You can now import your template kit into any website with Elementor installed. It will override your existing content, so we recommend creating a full backup before proceeding.
Once your backup is in place, you’ll need to enable Elementor Experiments on the destination website. As before, navigate to Elementor > Settings > Experiments. You can then select the Import Export Template Kit section and activate this feature.
Next, navigate to Templates > Kit Library. Click on Start Import. On the subsequent screen, select the file that you downloaded in the previous step:

If you’re applying your kit to a pre-existing installation, Elementor will display any templates with the same conditions as the one you’re importing. You can then choose which templates to replace and which ones to keep.
Once you’ve made your selection, click on Next. Elementor will now import your site kit.
Resolving the “Invalid File” Error in Elementor
If you encounter an “Invalid File” error when trying to import a template, it may be because the template was created using an earlier version of Elementor.
To resolve this issue, you can try temporarily switching to an earlier release of Elementor, but be aware that this may cause issues with your site.
As such, it is recommended to create a full backup before making any changes and consider putting your site into maintenance mode to prevent any disruptions for your visitors.
This will give you a safety net in case any problems arise and allow you to restore your site to its previous state if needed.
When you’re ready to proceed, head over to the Elementor plugin listing. Then, select Advanced View:
At the bottom of the page, use the dropdown menu to choose an earlier version of Elementor. For the best results, we recommend downloading the last version of Elementor.
Once you have this file, you have a few options. You could deactivate and delete your current Elementor version. You can then upload and activate the software that you just downloaded.
Alternatively, you can use Easy Theme and Plugin Upgrades. After activating this plugin, you can upload an older Elementor version without deactivating and deleting the most recent release.
After uploading the older release of Elementor, navigate to Plugins > Installed Plugins. WordPress should have switched to the earlier software version automatically:
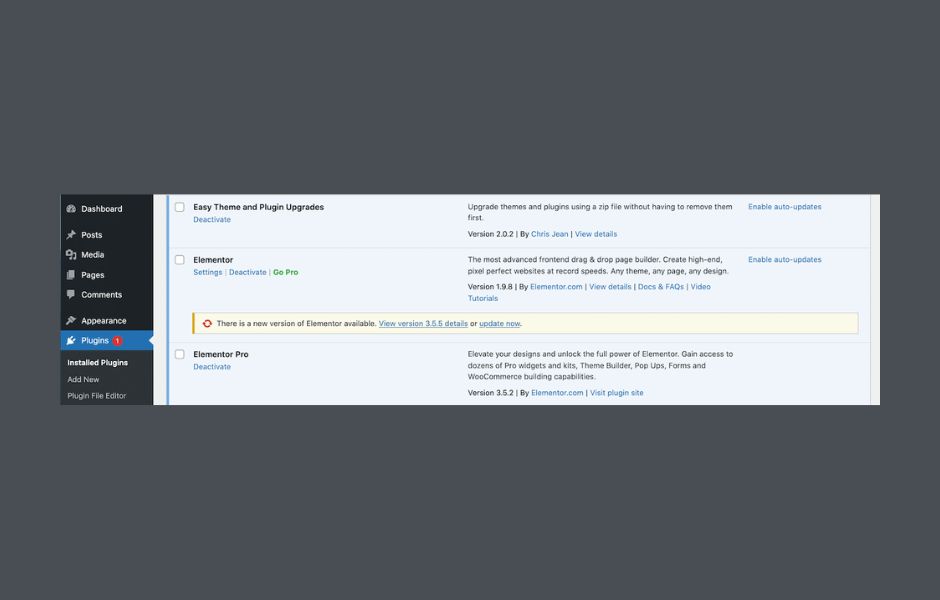
You should now be able to import your template without any issues. As soon as the import is complete, navigate back to Plugins > Installed plugins, and restore the most recent version of Elementor. This template should now be in your library, ready for use.
Top 3 Elementor Addons for Template Importing and Exporting
Elementor’s built-in import and export system allows you to create templates for sections, pages, and entire websites with ease.
However, if you’re looking to take this functionality to the next level, there are several addons available that promise to enhance the import and export process even further.
These addons can provide additional features and options to help you streamline your workflow and better manage your templates.
1. Happy Addons Pro
Happy Addons Pro is a powerful addon for Elementor that adds over 20 new features to the platform, including several that can integrate into your import and export workflow.

One such feature is the cross-domain copy-paste function, which allows you to easily copy content from one site and paste it into another, making it a useful tool if you manage multiple websites.
In addition to this, Happy Addons Pro offers a bespoke import feature that provides all the functionality of the built-in Elementor import and export system, such as the ability to search for templates by section name or filter by page section category.
If you want to reuse any Happy Addons Pro demo content, you can simply copy it into your Elementor editor panel.
Features:
- Choose from over 70 landing page templates.
- Duplicate any page or post with the Happy Clone feature.
- Easily copy section templates from HappyAddons Pro’s demo content.
- Copy a section from any website, and paste it into a different domain.
Pricing: Annual licenses start at $33.
2. Mighty Addons for Elementor
Mighty Addons for Elementor offers a selection of pre-designed template kits that can be imported into your website to provide a comprehensive range of pages suitable for various industries, including animal welfare, fitness, hospitality, consulting, and skydiving businesses.
In addition to these templates, Mighty Addons also features a cross-domain copy-paste function that allows you to easily transfer any section, row, column, or even entire pages between multiple Elementor-powered websites, streamlining your workflow if you manage multiple sites.
This feature can be a powerful addition to the traditional import/export functionality offered by Elementor.
Features:
- Easily copy images and videos between domains.
- Use a wide range of ready-to-use section templates.
- Integrate the tool with the Pixabay stock photography service.
The Mighty Addons for Elementor plugin is available for download, with a pro version also available for purchase. Licenses for the pro version start at $29, offering additional features and functionality beyond the core plugin.
Whether you choose the free or pro version, Mighty Addons can help enhance the design capabilities of your Elementor-powered website.
3. Envato Elements
The Envato Elements plugin for WordPress makes it easy to browse and import a wide range of page and block templates without leaving your dashboard.
In addition to providing access to thousands of templates, this plugin also offers template kits to help you quickly create a professional-looking website.
With Envato Elements, you can also access a vast library of over one million royalty-free images to use in your website, including stock photos.
Features:
- Multipurpose templates
- Flexible and fully customizable content
- One-click import
- Seamless integration with the Elementor UI
The Envato Elements plugin is available for free download, but to access and use the template content, you will need to purchase a subscription for $16.50 per month. Without a valid subscription, you will not be able to utilize the templates provided by the plugin.
Summary
Designing a visually appealing website can be a challenging task, but with the help of Elementor’s export and import template capabilities, you can save time and effort by using pre-made templates or reusing your own custom section and page templates in future projects.
If you’re particularly proud of a website that you’ve created using Elementor, you can even export the entire site for future use.